Registering & paying for trips
Open Trips to see what's coming up. Each trip shows its cost per student, deposit and registration deadline.
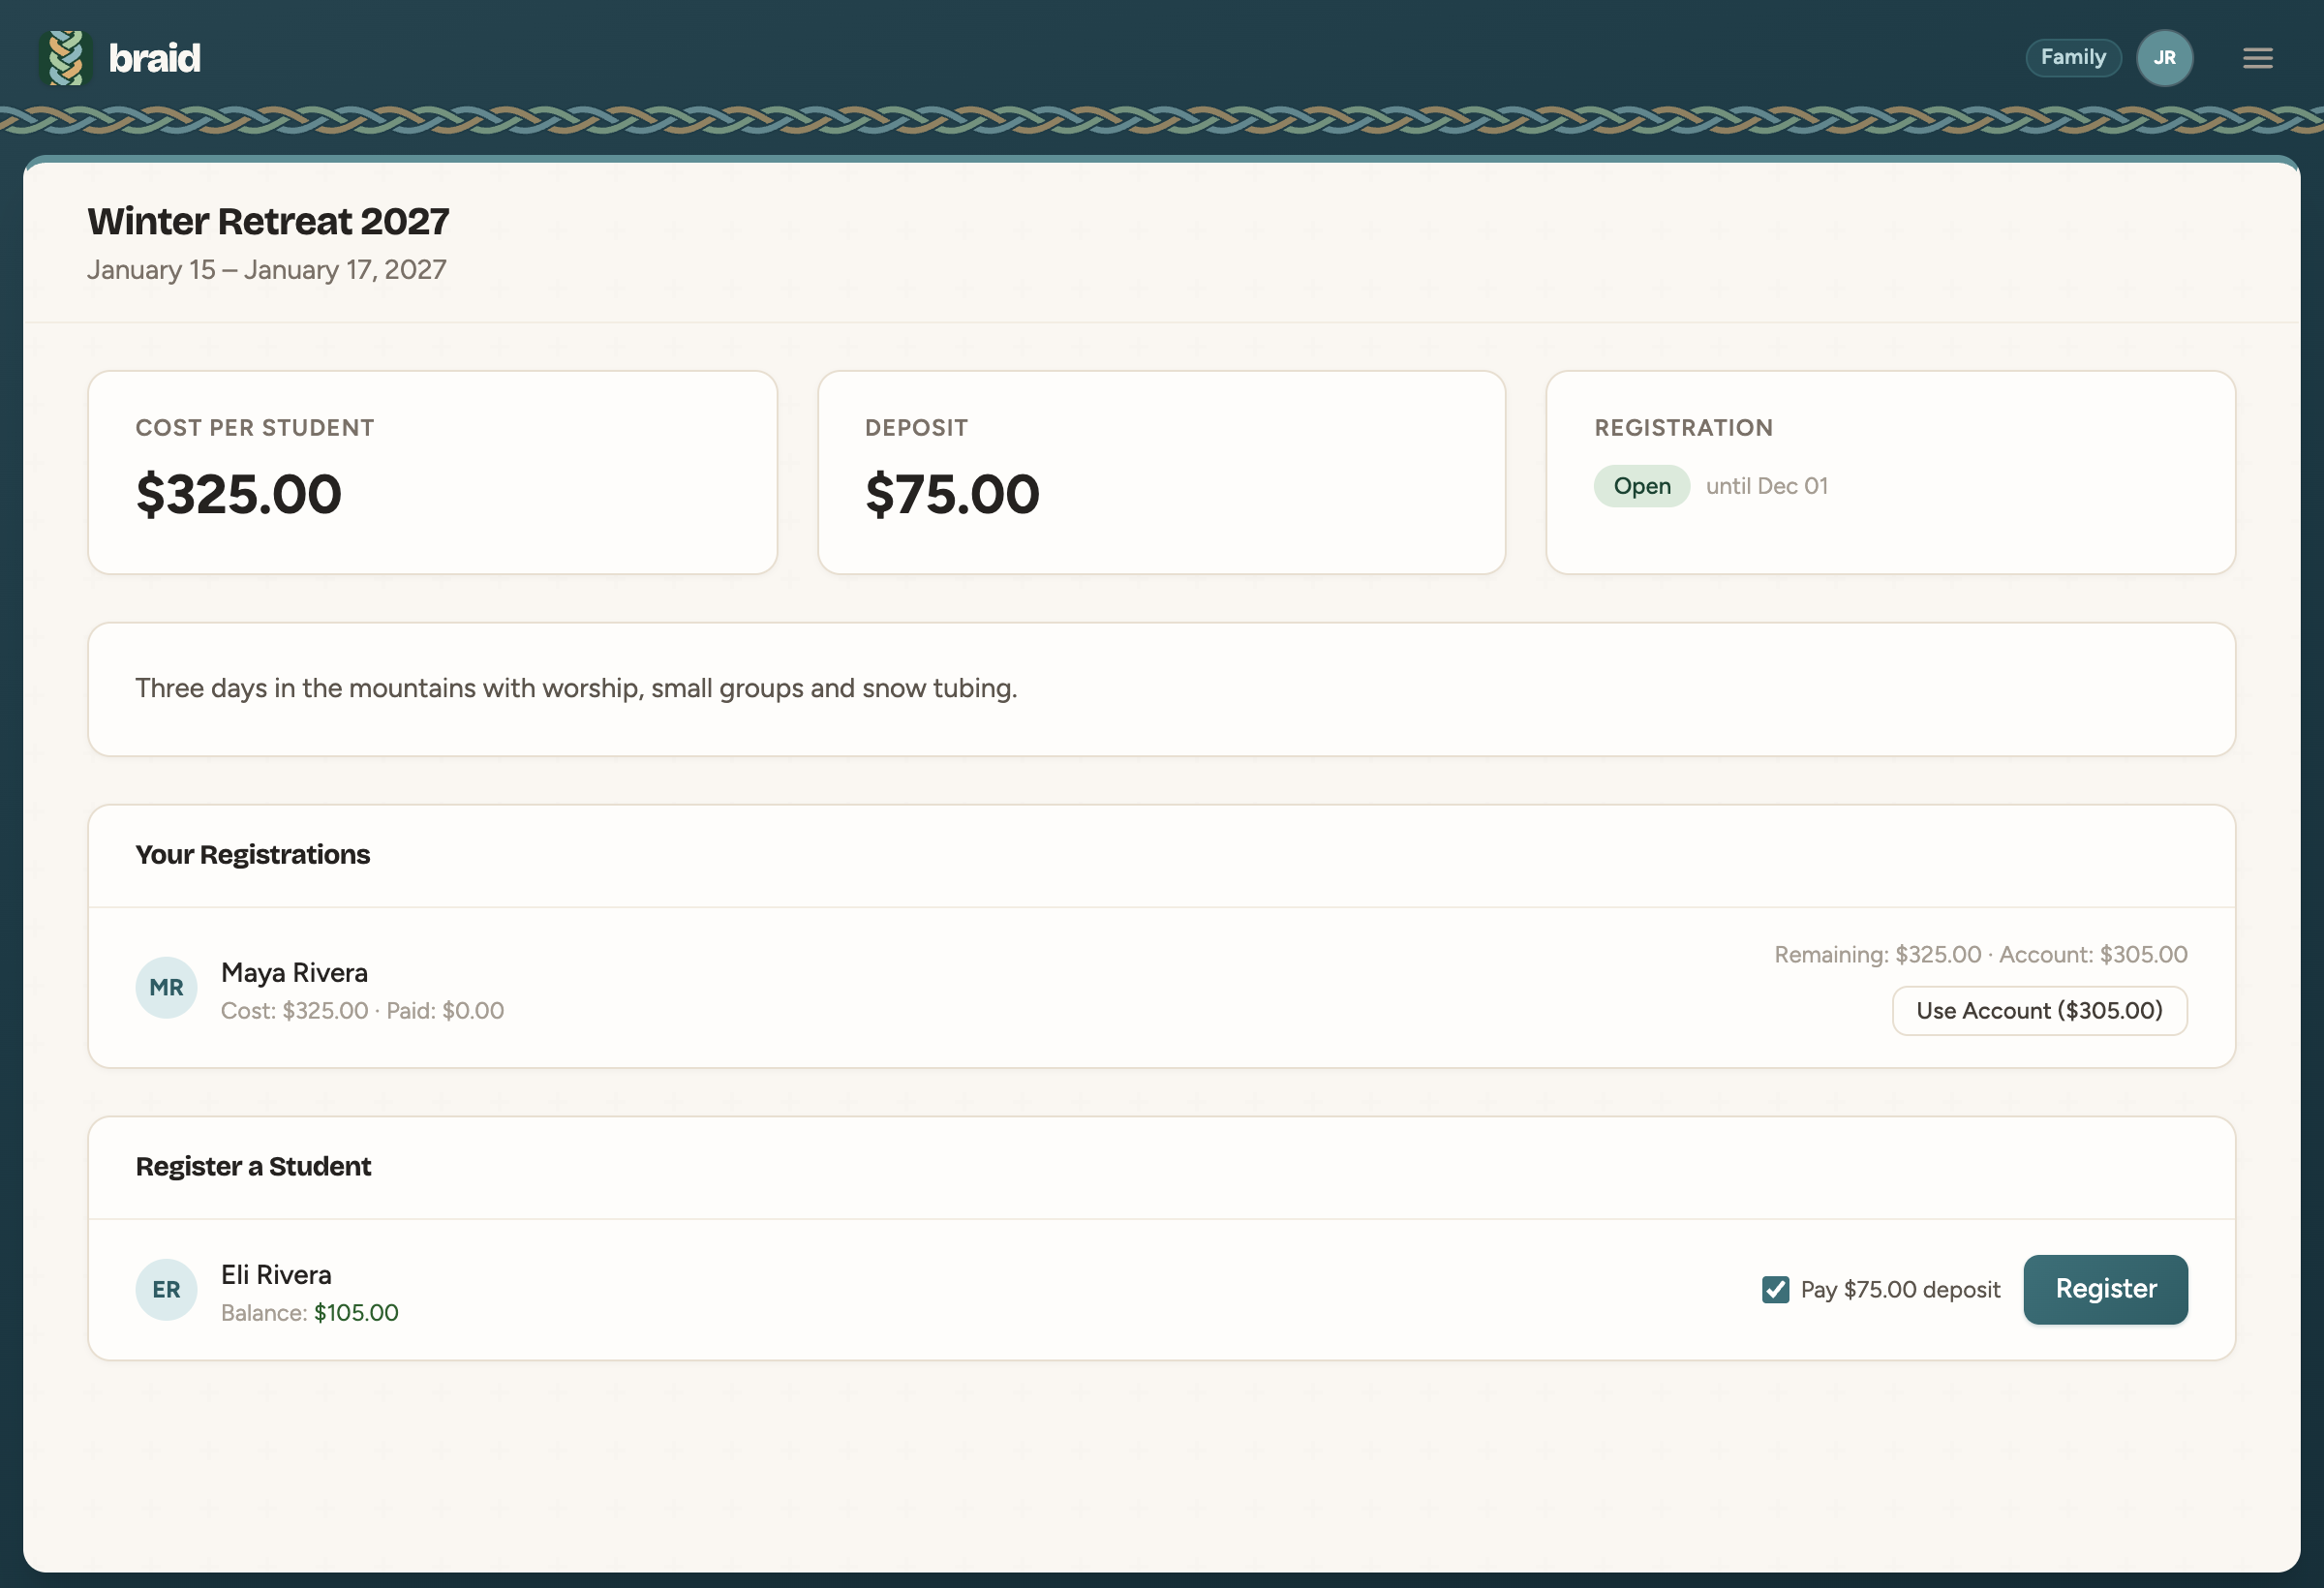
Register a student
- Open the trip.
- Under Register a Student, find your student.
- To pay the deposit from the student's account balance, leave Pay deposit ticked.
- Click Register.
Some trips need permission forms. These are added under Forms as soon as you register.
Pay toward a trip
Under Your Registrations, each student shows what they still owe:
- Use Account pays from the student's Braid balance.
- Pay Online lets you pay by card, if your ministry has turned on online payments. Enter an amount, then complete checkout.
External waivers & forms
Some trips require waivers or permission forms that are hosted by a third party — for example a camp registration site, a medical release form, or an activity provider's liability waiver. Your ministry leader adds these as links directly on the trip page.
If a trip has any, you'll see them listed under Waivers & Required Links near the top of the trip page. Each one opens in a new tab.
- These links are separate from Braid's built-in forms — they go to external websites that the ministry or activity provider controls.
- Completing an external waiver does not automatically update anything in Braid. Your ministry leader will confirm receipt on their end.
- If a link appears to be missing or broken, contact your ministry leader directly.